Sunday, June 24, 2012

A half baked idea

Let me start by saying that I love reed diffusers. I love the way they stylishly freshen my home with their sweet aromas. With that being said, I do not love that after a short period of time, it seems like the reeds are not diffusing the oil sufficiently enough to freshen the room. I also do not love spending money on replacement reeds, as I do not love spending money on replacing anything. Today, as I was adding more oil to the base, I decided that I had a choice: buy more reed diffusers, or find a way to make the old ones work. I chose the latter.

First, I gave the reeds a good rinse with warm water, holding the reeds length-wise with the faucet. After the rinse, they got a 10 minute soak in a sink of hot water and a few drops of Dawn soap (if you don't want to occupy the sink, I would just recommend a large bowl. The sink works best for containing spills and allowing the Dawn to foam.)


After a short shake dry, I placed the reeds on a baking sheet and set the oven to 250. When I checked on the reeds after 10 minutes, they were dry and the ends were porous. Now my reeds are working wonderfully. If you want a quick burst of freshness, I definitely recommend placing them back in the oil straight from the oven. The heat makes the oil diffuse even faster.

Happy smelling!


Sunday, May 20, 2012

Finally Finished!

This will be the shortest post ever. I just have to share that I finally finished my window panel project. I still need to get pictures to put in three of the windows (the guy suggested I put one photo of each of us individually, which is a great idea, except almost no pictures of me exist).

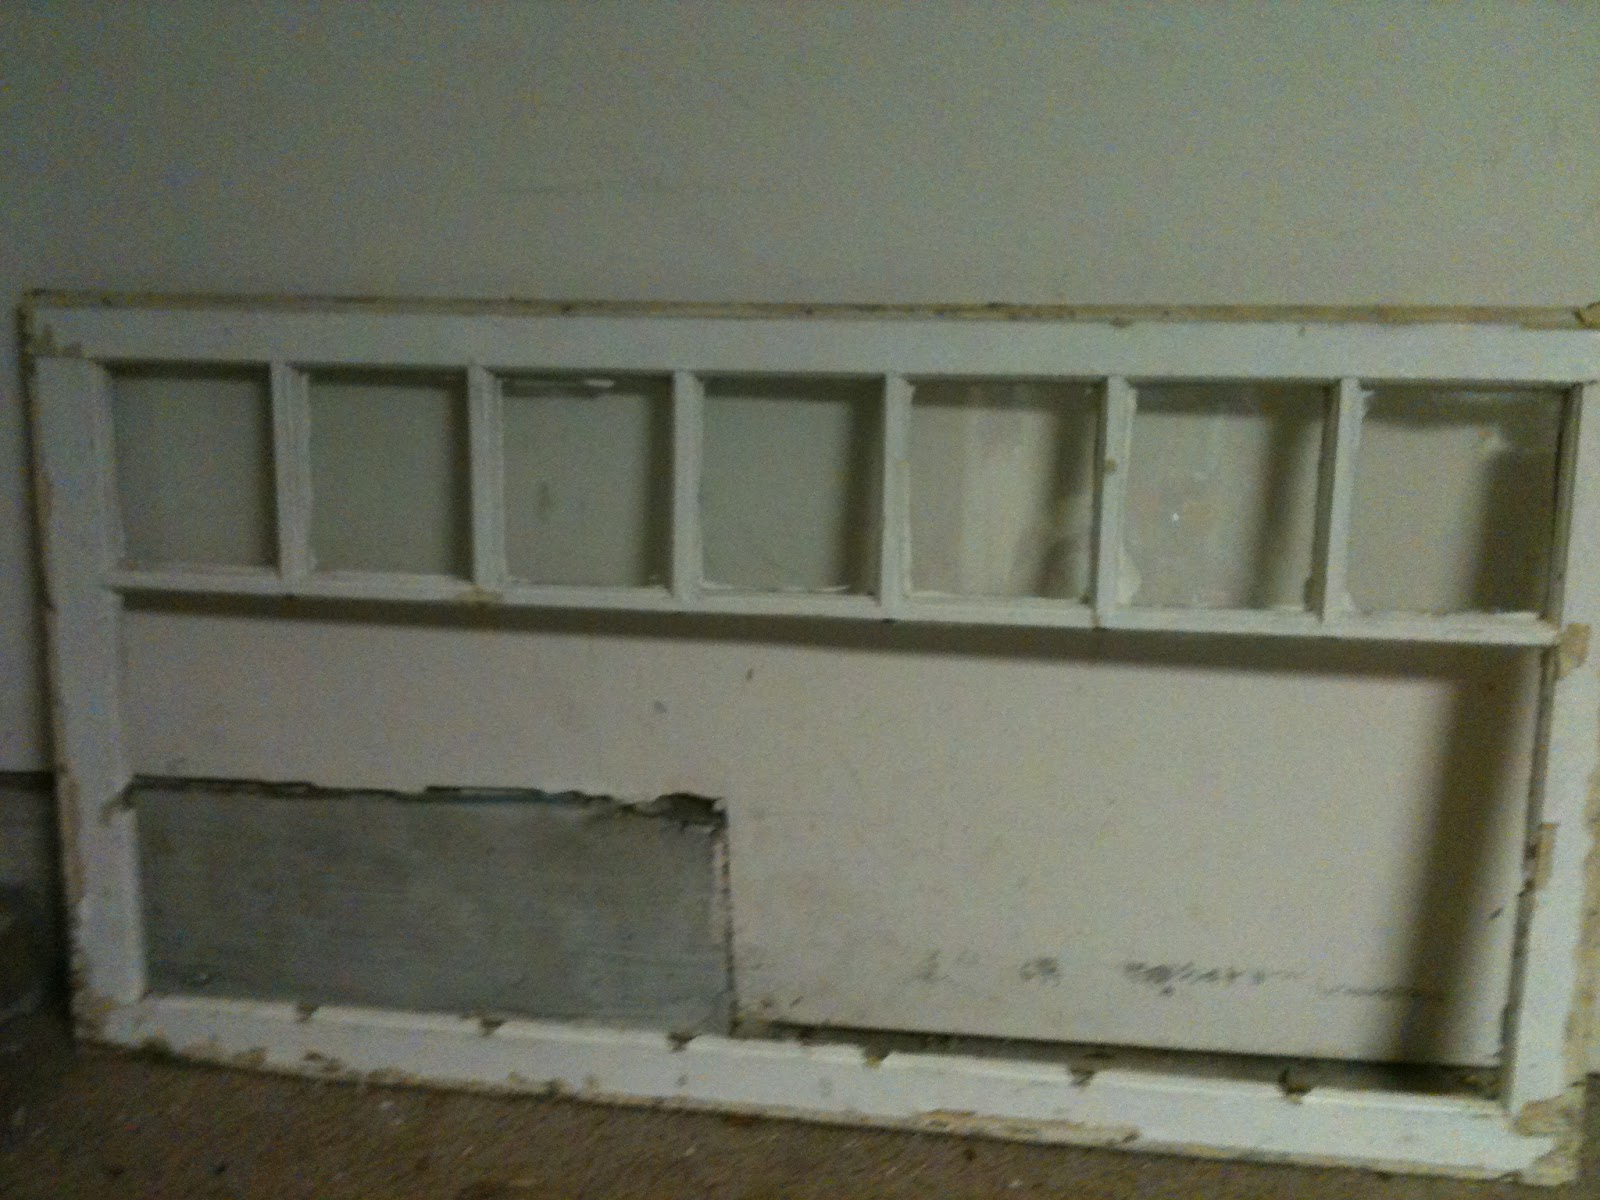
So this was day one, when I brought it home for $10 at my favorite antique store:

This is around the halfway point, when I first decided that I wanted the bottom of the panel to be a whiteboard:

And this is today, after adding hooks to the bottom for hanging dish towels, keys, dry erase markers, whatever.

Sadly, with the big move happening in about 3 weeks, we decided that hanging it would be counter-productive, as we would be taking it down and patching the holes in a few short weeks. Sigh.

At least it gives me three weeks to find decent pictures for those three empty panes... :)

Saturday, May 19, 2012

Half-finished everything

Oh. My. Goodness.

It's approaching the end of May. Everything is in hyperdrive. Here are a few key points.

-We bought our first house. Well, mostly. We are under contract and will close in mid-June. Packing and prepping ensues.
- My job has given me an official closing date of June 30th. After that, I have no idea what I will be doing.
-The guy finished the spring semester and moved into summer semester. His courses are only 6 weeks each, which means he is spending most of his free time hunched in front of the computer.

The one benefit of all of these things piling up like this is that I'm finding that I have extra time and room on the weekends to work on my half-finished projects.

First off, the window panel. I posted a picture of it in my last post, and said I'd have it done by the end of the week. This, of course, didn't happen. A big factor was the fact that I had an impossible time finding something to put in the big open section on the bottom. This week, I finally found something...
I have made a lot more progress since this picture from Thursday, but it's not quite finished yet, mostly due to the fact that the piece of whiteboard is just slightly too long. It WILL be done tomorrow, and I refuse to post a picture of it until it is.

Secondly, the subway sign. This is a new project that I started about two weeks ago and is still unfinished.

I had an old piece of particle board from the back of an old tv stand. I put 1/2 yard of remnant fabric underneath and trimmed around the edges.
I pulled the edges around the board tightly and attached using a hot glue gun.
I've started the words that I want on the front, but I don't know what to do to finish. Thoughts?

Thirdly, there's the numerous canvases that are sitting in my closet and on my floor in the spare bedroom. I'm not sure if I need to hang them, gift them, cover them and start again, or just pitch 'em. I am running out of room for them, but hate the idea of just throwing them out. Any idea of how I can use these in a more effective way?

Any input is appreciated. I will most definitely be putting up pictures of my finished window panel tomorrow.


Sunday, April 15, 2012

Happy tax season!

Not...

Anyway, the ides of April bring on a number of things that aren't related to forking over money. Warm weather, longer days, spring projects... the list goes on.

With spring cleaning in mind, I declared that my lamp shades are a hideous shade of cream that shows dust, cat hair, and any other flaw you can imagine. The before:

A few layers of Mod Podge, a 75 cent yard of scrap fabric and an X-Acto knife later:

With Easter passing, my lovely egg wreath is no longer relevant.

I couldn't bring myself to take the eggs and yarn off of the form to make a new one, so I just bought another form and wrapped it in some tan yarn I already had. A few shells and some items from the 97 cent aisle at Walmart, and you have this:

I'm in love with it. It makes me want to put up an umbrella and sit in a cushy chair with a margarita. (I hand painted the little margarita glasses, btw.) Side note, only 384 days until this is actually my last initial. Every day is more exciting than the one before.

Speaking of cushy chair, my soon to be in-laws have a great little teak bistro set in their backyard. My MiL asked me to look at the table and see if I could come up with a way to maybe remove the wood and replace it with a concrete slab, and mosaic the top. I looked at the table and chairs and much to my surprise, the wood was still mostly salvageable. I took the table top off of the legs, took the wood out of the frame, and sanded the pieces down to clean and smooth them. After staining the pieces a pretty redwood, they look like new. I'm mad at myself for not taking a before picture, but once the pieces are back on the hardware, there will be plenty of afters...

Last thing. I made a journey to our local antique shop this week and found this gem for $10. I cannot wait to finish it. The top panels still have the glass intact, but the bottom is sans glass. To me, it screams cork board. I'll post the after hopefully by this weekend.

I must've lost my rear end from working it off this weekend... :)

Monday, April 2, 2012

Lordy, lordy, looks who's 4...well, that's it.

Well, the day has come and gone. My smart, beautiful, hilarious little girl turned 4 last week. It was difficult to determine who was more excited about it, her or me. She loves being 4 like all of her friends and learning to ride her big girl bike. I love that with every passing day, she learns more and becomes this fabulously independent lady. She writes all of her letters, is learning to sound out words, and can kick all of our butts at Go Fish. *sigh*

So anyway, I know everyone is wondering what kind of cake she had. Well, for our family birthday party this year, I decided to skip making an actual cake. In previous years, we've always wound up with an abundance of extra cake that none of us want to eat after day two. This year, I tried the newly popular Mason Jar Cupcakes. There are a plethora of tutorials, and in citing just one, I'm doing a disservice to the 20 others that are out there, so I'm not citing anything. It's not plagarism; no one has a copyright over a cupcake recipe.

I went to Publix and got a 12 pack of jars for about $8.
(The lids were drying at the time of the picture. You'll see what I mean in a minute.)

All it took was 1 box of white cake mix, about 2 tbsp of cornstarch, and a box of food coloring.

I mixed the cake mix according to the box instructions, then mixed in the cornstarch to thicken the mixture for layering. You can opt not to do this if you want funky tie-dye looking layers, but my OCD wouldn't allow this.

Separate the mixture into sandwich bags; the number varies based on the number of colors you're using. I used four. Add about 4-5 drops of food coloring into each bag, let out the excess air and seal. Use the countertop to knead, blending the coloring into the mix.
Move the batter away from one corner and cut it to allow for piping. Be aware of your size; a larger cut will cause the batter to pipe out quickly.

Layer each of your colors into your mason jars (note: these do not need to be greased prior to using). The easiest method I found was to use up each color at once, meaning I put blue in all of my jars, then green, then yellow, then red.

Fill a 9x13" pan with about 1/2" of water and place your jars in the pan. Typically you would bake according to the box directions, but because my oven runs so hot and I was paranoid about burning them, I baked mine at 350 for 30 minutes. They came out perfectly moist and fluffy.

For icing, I decided to keep with my sandwich bag theme and fill a bag with icing and pipe it into the cupcakes. Kristen helped put the sprinkles on top. :)

Here's my finished version, complete with the decorated tops I made. You can find my tutorial on that here.


Thursday, March 8, 2012

It's March already?!

Not only is it March...it's spring break in our lovely city, which means Ashley doesn't work for the next 10 days! WOOOOOOO!!!

The next four days will be occupied with our annual trip to St. Louis, two of which will be dedicated to driving (just under 11 hours each way...bleah). After that, I have complete freedom to do as I wish during the day. The downside to this is finding things to do. Here are a few things that I've accomplished so far in March:

-Thin Mint Cheesecake. I didn't take a single picture, but the recipe was so simple that you can make your own and don't need a stinkin' picture.

16oz softened cream cheese (I used fat free)
2 eggs
1.5 cups sugar
1 tsp vanilla
1/2 sleeve Thin Mint cookies (roughly)

Whip the cream cheese with mixer until smooth. Add sugar, egg and vanilla until well blended. Crush about 3/4 of the thin mints and gently fold them into the mix. Pour mixture into prepared pie crust*. Bake at 350 for 45 minutes or until firm. Chill in fridge for four hours. Top with remaining cookies. Devour.

*I say prepared pie crust because I bought a chocolate pie crust for this cheesecake. I considered doing a homemade crust from the thin mints, but I feared the chocolate covering from the cookies would make it to crumbly to use. An Oreo crust, store bought or hand made, may be a good option too. If anyone tries the Thin Mint crust, let me know how it goes!

-More wall art. I have so much of it now that a big portion of it is sitting against the wall of my spare bedroom while I find a place for it. This one was my version of the tutorial found here, with slightly different colors and smaller circles, because I love the look of the branches with what Kristen calls "baby flowers".


-Loaded baked potato salad. Again, no picture, but oh my god it's amazing.

2.5 lbs red skinned potatoes
1/2 cup chopped green onion
1 package bacon, cooked and crumbled
1/2 cup shredded cheddar cheese
1 cup Greek yogurt
salt and pepper to taste

Boil potatoes until tender but firm. Chill in refrigerator for 1 hour. Cube potatoes and combine with yogurt. While potatoes are chilling, you can cook the bacon. I cooked mine on a wire rack on top of a cookie sheet at 325 for 25 minutes. The grease drips onto the cookie sheet and makes for perfectly crisp bacon. Add bacon, salt, pepper and cheese. You can top individual servings with onion, or leave it off for your pickier diners. I added it into the mix with the other ingredients, and the onion haters just picked them out without complaint. I served mine with crock pot BBQ chicken and baked beans. Best summer meal ever.

If anyone has ideas for new things I can do with my new found free time, feel free to comment!

Wednesday, February 29, 2012

Cereal box picture frames!

Last week Kristen and I spent our Thursday girl's night in marble painting. For those who aren't familiar, the term is pretty self-explanatory. You take marbles and drop them in different colors of paint, and place a sheet of paper inside a decently sized box top. I used a printer paper box lid, and recommend taping the back of the paper to the box to prevent it from sliding. Place the marbles in the box lid with a spoon and let your child shift the box to move the marbles across the paper. The result is a beautiful abstract piece any kid will be proud to see in his/her room.

Of course, I couldn't just let this masterpiece be push-pinned up on her wall... :)

As luck would have it, Kristen finished off the last of a box of cereal this morning. Noticing it in the recycle box after work, I realized that it was about the same size as her picture. Then it hit me: picture frame.

Some of you may be fortunate enough to have the bigger sized cereal boxes and don't have the same size issue that I did, but if you don't, you're about to see my efforts.

The box I had was long enough, but about 2 inches short in width. In order to make this work as a frame, I had to cut the box into sections. Luckily, the sides of the box were the perfect length to use as the base and top of the frame. I used the front panel of the box to cut two more sections for the sides of the frame. To keep the pieces together, I wrapped the corners in clear packing tape:
On a side note, I do not recommend this particular cereal. I will try the generic versions of cereals, and many of them are the same in taste and much cheaper, but this one is no substitute for brand name Honey Bunches of Oats.

I considered wrapping the frame in fabric, but I lacked the bright and happy colors that my daughter loves. I pulled out my arsenal of scrapbook paper and had Kristen pick her favorite pattern. For this part, I highly recommend an X-acto knife. I was so caught up in the project that I neglected to get a picture, but the process is fairly simple. Lay the paper over the frame (box pattern side up) and flip them over together. Use the X-acto knife to cut the paper to fit the frame. Use your packing tape to attach the paper to the frame. Place your child's picture on the back of the frame and attach it with (you guessed it) more packing tape. (You can opt for Scotch tape or something less permanent if you want to reuse the frame for their other creations).
And voila! Lovely abstract artwork with a neat personalized frame. This one is hanging above her dresser, which I have a feeling will soon become a miniature art gallery.